My serger has sat for four months due to some intimidation and some lack of time. I finally found the time last week to figure it out. My manual was very helpful, but I was having major issues with my serger tension. I could not figure it out. After searching around for help, I found this great tutorial on YouTube that provides a way to know your serger's tension. I've written it out here so that I'll always have a record of it. If you want an even more clear and detailed description, please visit YouTube to watch "The Secret to Taming Your Serger."
If you want a quick tutorial, here is my serger tension test:
First, thread your serger, making sure to have a different color thread in the left needle, right needle, upper looper, and lower looper.
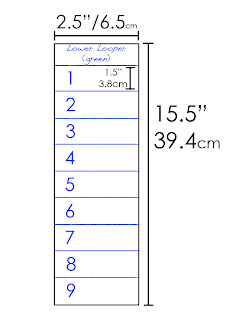
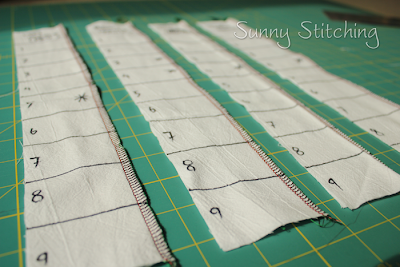
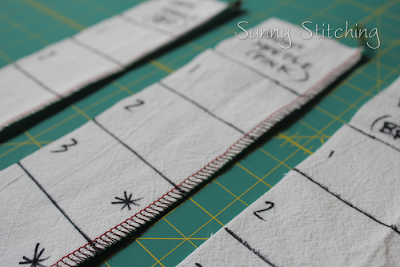
Next, cut four rectangles out of white cotton: 5 inches (13cm) x 15.5 inches (39.4cm). Fold the fabric in half lengthwise so that you now have the dimensions that are the same as the above diagram. Label your fabric according to the diagram. The lines should be spaced 1.5" (3.8cm) apart. Each space should have a number (1 to 9). Make one for the Left Needle, Right Needle, Upper Looper, and Lower Looper. Make sure to note the color of thread.
Next, start at the top with the tension of the specific strip set to the lowest tension which in my case was 1. Serge until you reach the line. Then change the tension to 2. And so on. You will feel the tension tighten as you continue to serge and adjust the tension to higher numbers, all the way to your highest tension setting which in my case was 9.
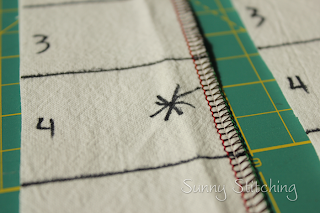
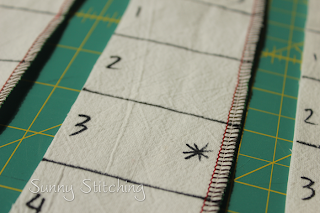
After you have serged the edge of your strip, take a look at it and decide which number has the best tension for that specific thread (this is where noting the color of thread is important). Mark a star in the space.
For my right needle, I number 3 and number 4 looked the same, which I thought a bit strange, but I marked them both anyway. My serger was bought used, so I have no idea what it has been through! I was also surprised that my right needle was 5, but that's what was best.
Once I completed this serger tension test, I made sure that all my tension dials were set to the best number, and gave it a try. It worked! I will keep these strips forever because I know that they will be a very important reference.
☼
I'm linking up to some of these fabulous parties.


I am visiting you from Navy Wifey Peters. I will definitely have to try this. As someone who has sewn for 40 years, the serger of mine hardly gets any use. I hate changing anything. I think I just need to spend some time with it. I will pin this to my Pinterest-Sewing board. See my post on teaching your children to sew:
ReplyDeletehttp://www.thelostapron.com/2013/04/summer-sewing-camp.html
I wish I still had my serger alas a friend borrowed it from a move of mine years ago & I never got it back or repurchased one. Thanks for sharing & linking up @ DearCreatives.com hope to see you again soon!
ReplyDelete